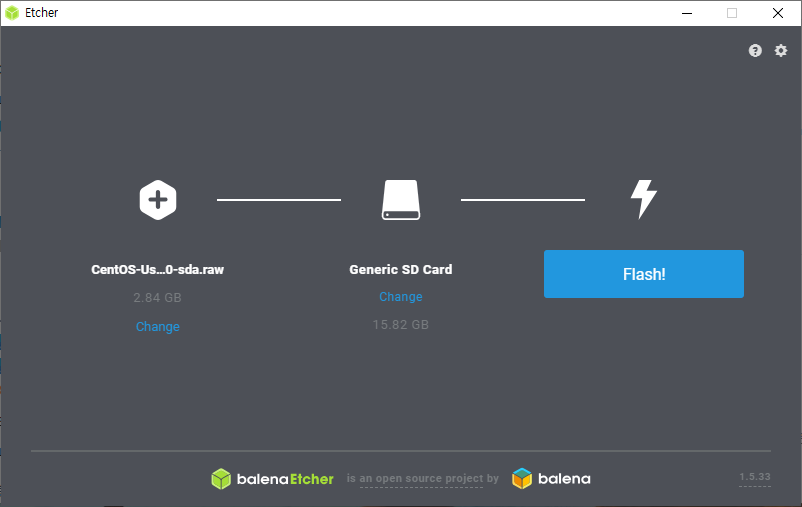
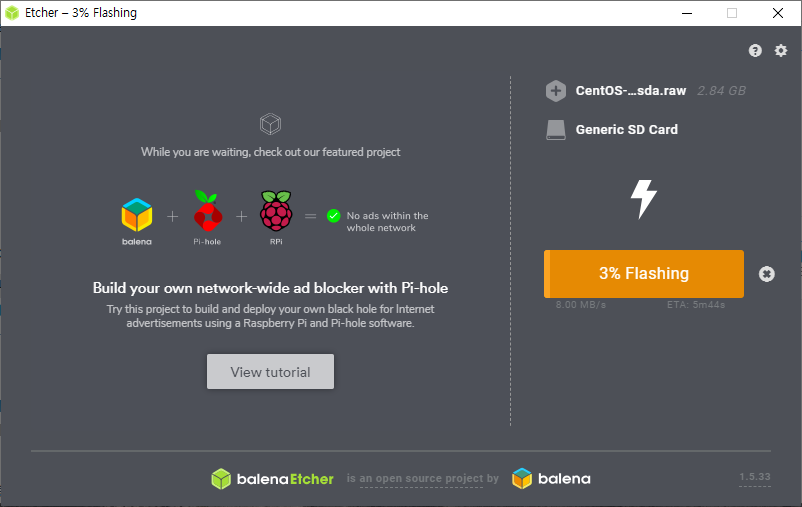
라즈베리파이에 CentOS 를 설치하고 콘솔창에서 아래와 같은 메시지가 반복적으로 출력이 되더군요~

Under-voltage detected! (0x00050005)
Voltage normalised (0x00000000)
rpi_firmware_get_throttled: 3 callbacks suppressed

▶ 방법1
  /boot/cmdline.txt 파일에 loglevel=1 을 추가하는 방법입니다.
console=ttyAMA0,115200 console=tty1 root=/dev/mmcblk0p3 rootfstype=ext4 elevator=deadline rootwait loglevel=1

▶ 방법2
  현재만 안보이게 하려면 "dmesg --console-off" 명령어를 실행합니다.
재부팅 되더라도 안보이게 하려면
# echo "dmesg --console-off" >> /etc/rc.local
# chmod 744 /etc/rc.local
# reboot
위의 내용 처럼 하면 됩니다.


블로그 이미지

영은파더♥

가상서버호스팅 VPS 리눅스 서버관리 윈도우 IT

,

USB 외장하드로 OTP 을 이용해서 영구적으로 microSD 에서 USB 로 부팅 위치를 바꿔주는 방법도 있겠지만,

/boot 영역은 microSD 카드로 부팅하고 루트영역만 USB 외장 HDD 를 사용하는 방법도 있습니다.

/boot/cmdline.txt 파일을 수정하고 rootfs 를 USB 외장 하드디스크로 파티션 통째로 복사하면 됩니다.

먼저 루트 영역 파티션을 복사합니다. ( 시스템 환경마다 mmcblk0p2 또는 mmcblk0p3 )

dd if=/dev/mmcblk0p3 of=/dev/sda1 bs=512K status=progress

시간이 오래걸려서 진행 상태를 알기 위해서 status=progress 옵션을 붙였습니다.

복사가 완료되었으면 /boot/cmdline.txt 파일을 수정합니다.

# cat /boot/cmdline.txt
console=ttyAMA0,115200 console=tty1 root=/dev/sda1 rootfstype=ext4 elevator=deadline rootwait

root=/dev/mmcblk0p3 부분을 root=/dev/sda1 으로 변경합니다.

그리고 /etc/fstab 파일은 수정할 필요가 없습니다.

이제 reboot 명령어로 재부팅 하면 됩니다.

# df -h
Filesystem      Size  Used Avail Use% Mounted on
/dev/root        14G  2.0G   12G  15% /
devtmpfs        460M     0  460M   0% /dev
tmpfs           464M     0  464M   0% /dev/shm
tmpfs           464M   12M  452M   3% /run
tmpfs           464M     0  464M   0% /sys/fs/cgroup
/dev/mmcblk0p1  667M   43M  625M   7% /boot
tmpfs            93M     0   93M   0% /run/user/0

USB 외장하드디스크 공간이 남으면 확장해서 사용해도 됩니다.

microSD 카드의 수명 보다는 아무래도 외장하드 디스크 수명이 더 길기 때문에 이런 방법을 사용하지만,

외장하드도 갑자기 고장날 수가 있기 때문에 이중으로 백업을 하는 것이 좋겠습니다.


블로그 이미지

영은파더♥

가상서버호스팅 VPS 리눅스 서버관리 윈도우 IT

,

라즈베리파이에 os 설정을 어렵게 했다가 날리는 경험이 많죠~

사용하고 있는 microSD 카드를 백업하는 방법입니다.

USB 외장 하드를 /mnt/hdd 에 마운트 했다는 가정하에 dd 명령어로 압축백업하는 방법입니다.

[root@ivps ~]# dd if=/dev/mmcblk0 bs=512K | gzip -c > /mnt/hdd/raspberry-pi-centos7.img.gz
30174+0 records in
30174+0 records out
15819866112 bytes (16 GB) copied, 3289.32 s, 4.8 MB/s

백업 되고 있는 상태를 알고싶다면 status=progress 옵션을 추가하면 됩니다.

압축없이 : dd if=/dev/mmcblk0 bs=512K status=progress of=/mnt/hdd/raspberry-pi-centos7.img
압축백업 : dd if=/dev/mmcblk0 bs=512K status=progress | gzip -c > /mnt/hdd/raspberry-pi-centos7.img.gz

복원방법은 balenaEtcher 또는 rufus 같은 유틸리티로 굽는게 좋겠지만 리눅스에서 dd 명령어로는 아래와 같습니다.

dd if=/mnt/hdd/raspberry-pi-centos7.img of=/dev/mmcblk0 bs=512K
gzip -cd /mnt/hdd/raspberry-pi-centos7.img.gz | dd of=/dev/mmcblk0 bs=512K

실제 운영중인 상태에서는 에러가 발생할 수도 있습니다.


블로그 이미지

영은파더♥

가상서버호스팅 VPS 리눅스 서버관리 윈도우 IT

,

라즈베리파이 2 B 모델에 랜선과 microSD 카드만 있는 상태에서 측정한 소비전력입니다.

HDMI, USB 연결하지 않은 상태입니다.


[라즈베리파이] 기본장치 소비전력 측정

아이들에서 1.5W


[라즈베리파이] 기본장치 소비전력 측정

코어 4개 부하 걸은 상태에서 2.0W

초소형 컴퓨터 답게 소비전력 하나는 마음에 드는군요~


아이들 상태에서 2.5 하드디스크 외장하드를 USB 에 물렸더니 순간 4.9W 까지 올라가네요~

그리고 shutdown 명령어로 파워가 꺼진 상태에서는 0.5W 가 먹는데 이건 요즘 PC 보다 조금더 먹거나 비슷한 것 같습니다.


서버 운영시 소비전력은 적지만 수명이 짧은 SD 카드만으로 운영하다가 고장나면 다른 SD 카드로 바꿔주느냐,

아니면 소비전력은 좀 더 먹지만 USB 외장하드로 운영을 하느냐 고민이 좀 되는군요~


블로그 이미지

영은파더♥

가상서버호스팅 VPS 리눅스 서버관리 윈도우 IT

,

먼저 php 5.4 를 설치하고 아래 repo 를 추가해고 yum update 를 해주시면 됩니다.

cat > /etc/yum.repos.d/epel.repo << EOF
[epel]
name=Epel rebuild for armhfp
baseurl=https://armv7.dev.centos.org/repodir/epel-pass-1/
enabled=1
gpgcheck=0
EOF

cat > /etc/yum.repos.d/php72-testing.repo << EOF
[php72-testing]
name=Remi php72 rebuild for armhfp
baseurl=https://armv7.dev.centos.org/repodir/community-php72-testing/
enabled=1
gpgcheck=0
EOF

cat > /etc/yum.repos.d/remi.repo << EOF
[remi]
name=Remi's RPM repository for Enterprise Linux 7 - $basearch
mirrorlist=http://cdn.remirepo.net/enterprise/7/remi/mirror
enabled=1
gpgcheck=1
gpgkey=https://rpms.remirepo.net/RPM-GPG-KEY-remi
EOF


  출처 : https://blog.centos.org/2018/01/php-7-2-for-centos-7-armhfp/

repo 를 먼저 추가해 주고 설치해도 됩니다.


블로그 이미지

영은파더♥

가상서버호스팅 VPS 리눅스 서버관리 윈도우 IT

,

라즈베리파이용으로 배포된 이미지를 SD 카드에 구웠더니 16GB 용량인데도 root 파티션이 너무 작게 잡혀있네요~

4G 용량 이하로 이미지가 만들어졌는가 봅니다.

남아있는 공간을 할당하여 사이즈를 확장하는 방법입니다.

늘였다가 줄이기는 안됩니다. ( 먹통이 됩니다. )

[root@localhost ~]# df -h
Filesystem      Size  Used Avail Use% Mounted on
/dev/root       1.4G  1.3G  112M  92% /
devtmpfs        460M     0  460M   0% /dev
tmpfs           464M     0  464M   0% /dev/shm
tmpfs           464M   12M  452M   3% /run
tmpfs           464M     0  464M   0% /sys/fs/cgroup
/dev/mmcblk0p1  667M   43M  625M   7% /boot
tmpfs            93M     0   93M   0% /run/user/0

[root@localhost ~]# fdisk /dev/mmcblk0
Welcome to fdisk (util-linux 2.23.2).

Changes will remain in memory only, until you decide to write them.
Be careful before using the write command.


Command (m for help): p

Disk /dev/mmcblk0: 15.8 GB, 15819866112 bytes, 30898176 sectors
Units = sectors of 1 * 512 = 512 bytes
Sector size (logical/physical): 512 bytes / 512 bytes
I/O size (minimum/optimal): 512 bytes / 512 bytes
Disk label type: dos
Disk identifier: 0x000cc7a5

        Device Boot      Start         End      Blocks   Id  System
/dev/mmcblk0p1   *        2048     1370111      684032    c  W95 FAT32 (LBA)
/dev/mmcblk0p2         1370112     2369535      499712   82  Linux swap / Solaris
/dev/mmcblk0p3         2369536     5298175     1464320   83  Linux  ( 이 부분을 지웠다가 다시 늘여줍니다. )
   ( 시작블럭이 같고 뒷쪽에 남아있는 영역을 사용하는 것은 기존 파일이 있더라도 가능한가 봅니다. )

Command (m for help): d
Partition number (1-3, default 3): 3
Partition 3 is deleted

Command (m for help): p

Disk /dev/mmcblk0: 15.8 GB, 15819866112 bytes, 30898176 sectors
Units = sectors of 1 * 512 = 512 bytes
Sector size (logical/physical): 512 bytes / 512 bytes
I/O size (minimum/optimal): 512 bytes / 512 bytes
Disk label type: dos
Disk identifier: 0x000cc7a5

        Device Boot      Start         End      Blocks   Id  System
/dev/mmcblk0p1   *        2048     1370111      684032    c  W95 FAT32 (LBA)
/dev/mmcblk0p2         1370112     2369535      499712   82  Linux swap / Solaris

Command (m for help): n
Partition type:
   p   primary (2 primary, 0 extended, 2 free)
   e   extended
Select (default p): p
Partition number (3,4, default 3):
First sector (2369536-30898175, default 2369536):
Using default value 2369536
Last sector, +sectors or +size{K,M,G} (2369536-30898175, default 30898175):
Using default value 30898175
Partition 3 of type Linux and of size 13.6 GiB is set

Command (m for help): p

Disk /dev/mmcblk0: 15.8 GB, 15819866112 bytes, 30898176 sectors
Units = sectors of 1 * 512 = 512 bytes
Sector size (logical/physical): 512 bytes / 512 bytes
I/O size (minimum/optimal): 512 bytes / 512 bytes
Disk label type: dos
Disk identifier: 0x000cc7a5

        Device Boot      Start         End      Blocks   Id  System
/dev/mmcblk0p1   *        2048     1370111      684032    c  W95 FAT32 (LBA)
/dev/mmcblk0p2         1370112     2369535      499712   82  Linux swap / Solaris
/dev/mmcblk0p3         2369536    30898175    14264320   83  Linux  ( 엄청 늘어났습니다. )

Command (m for help): w
The partition table has been altered!

Calling ioctl() to re-read partition table.

WARNING: Re-reading the partition table failed with error 16: Device or resource busy.
The kernel still uses the old table. The new table will be used at
the next reboot or after you run partprobe(8) or kpartx(8)
Syncing disks. ( 재부팅하라고 하네요~ )

[root@localhost ~]# reboot
login as: root
root@192.168.1.3's password:
Last login: Wed May  8 13:57:11 2019 from 192.168.1.83
[root@localhost ~]# df -h
Filesystem      Size  Used Avail Use% Mounted on
/dev/root       1.4G  1.3G  113M  92% /
devtmpfs        460M     0  460M   0% /dev
tmpfs           464M     0  464M   0% /dev/shm
tmpfs           464M   12M  452M   3% /run
tmpfs           464M     0  464M   0% /sys/fs/cgroup
/dev/mmcblk0p1  667M   43M  625M   7% /boot
tmpfs            93M     0   93M   0% /run/user/0


[root@localhost ~]# resize2fs /dev/mmcblk0p3 ( 리사이즈 명령어를 실행합니다. )
resize2fs 1.42.9 (28-Dec-2013)
Filesystem at /dev/mmcblk0p3 is mounted on /; on-line resizing required
old_desc_blocks = 1, new_desc_blocks = 2
The filesystem on /dev/mmcblk0p3 is now 3566080 blocks long.

[root@localhost ~]# df -h
Filesystem      Size  Used Avail Use% Mounted on
/dev/root        14G  1.3G   13G  10% /
devtmpfs        460M     0  460M   0% /dev
tmpfs           464M     0  464M   0% /dev/shm
tmpfs           464M   12M  452M   3% /run
tmpfs           464M     0  464M   0% /sys/fs/cgroup
/dev/mmcblk0p1  667M   43M  625M   7% /boot
tmpfs            93M     0   93M   0% /run/user/0

늘어난 용량을 확인할 수가 있습니다.

이렇게 늘인 공간을 다시 줄이기는 안되는군요~


블로그 이미지

영은파더♥

가상서버호스팅 VPS 리눅스 서버관리 윈도우 IT

,

라즈베리파이 2/3 용 CentOS 7 이미지의 루트계정 초기 비번은 centos 입니다.

라즈베리파이 2 에 로그인해서 간단하게 정보를 살펴보았습니다.


[root@localhost ~]# cat /proc/cpuinfo
processor       : 0
model name      : ARMv7 Processor rev 5 (v7l)
BogoMIPS        : 38.40
Features        : half thumb fastmult vfp edsp neon vfpv3 tls vfpv4 idiva idivt vfpd32 lpae evtstrm
CPU implementer : 0x41
CPU architecture: 7
CPU variant     : 0x0
CPU part        : 0xc07
CPU revision    : 5

processor       : 1
model name      : ARMv7 Processor rev 5 (v7l)
BogoMIPS        : 38.40
Features        : half thumb fastmult vfp edsp neon vfpv3 tls vfpv4 idiva idivt vfpd32 lpae evtstrm
CPU implementer : 0x41
CPU architecture: 7
CPU variant     : 0x0
CPU part        : 0xc07
CPU revision    : 5

processor       : 2
model name      : ARMv7 Processor rev 5 (v7l)
BogoMIPS        : 38.40
Features        : half thumb fastmult vfp edsp neon vfpv3 tls vfpv4 idiva idivt vfpd32 lpae evtstrm
CPU implementer : 0x41
CPU architecture: 7
CPU variant     : 0x0
CPU part        : 0xc07
CPU revision    : 5

processor       : 3
model name      : ARMv7 Processor rev 5 (v7l)
BogoMIPS        : 38.40
Features        : half thumb fastmult vfp edsp neon vfpv3 tls vfpv4 idiva idivt vfpd32 lpae evtstrm
CPU implementer : 0x41
CPU architecture: 7
CPU variant     : 0x0
CPU part        : 0xc07
CPU revision    : 5

Hardware        : BCM2835
Revision        : a21041
Serial          : 000000001fa9334f

[root@localhost ~]# cat /etc/centos-release
CentOS Linux release 7.6.1810 (AltArch)

[root@localhost ~]# df -h
Filesystem      Size  Used Avail Use% Mounted on
/dev/root       1.4G  896M  451M  67% /
devtmpfs        460M     0  460M   0% /dev
tmpfs           464M     0  464M   0% /dev/shm
tmpfs           464M   12M  452M   3% /run
tmpfs           464M     0  464M   0% /sys/fs/cgroup
/dev/mmcblk0p1  667M   38M  629M   6% /boot
tmpfs            93M     0   93M   0% /run/user/0
[root@localhost ~]# free -m
              total        used        free      shared  buff/cache   available
Mem:            927          38         767          11         120         832
Swap:           487           0         487

블로그 이미지

영은파더♥

가상서버호스팅 VPS 리눅스 서버관리 윈도우 IT

,

라즈베리파이 2, 3 용 CentOS Image 를 다운로드 하고 굽는 방법입니다.

https://wiki.centos.org/Download 여기에서 해당 링크로 들어가시면 됩니다.

RaspberryPi 2/3 CentOS Image Download

Gnome, KDE, Minimal image 중에 원하는 이미지를 받으면 됩니다.

http://isoredirect.centos.org/altarch/7/isos/armhfp/CentOS-Userland-7-armv7hl-RaspberryPI-GNOME-1810-sda.raw.xz

http://isoredirect.centos.org/altarch/7/isos/armhfp/CentOS-Userland-7-armv7hl-RaspberryPI-KDE-1810-sda.raw.xz

http://isoredirect.centos.org/altarch/7/isos/armhfp/CentOS-Userland-7-armv7hl-RaspberryPI-Minimal-1810-sda.raw.xz

미러사이트를 잘 골라야 속도가 빠르네요~

다운로드 후에 https://www.balena.io/etcher/ 여기에서 Etcher 프로그램을 받습니다.

balenaEtcher Download

Portable 이 편하겠네요~

다운로드 받고 실행하면 한참 뒤에 아래와 같이 프로그램이 실행이 됩니다.

balenaEtcher 이미지굽기

Select image 를 눌러서 라즈베리용 CentOS 7 이미지를 선택하고 일정 시간이 지나면 Flash 버튼이 실행할 수 있도록 바뀌면 Flash 를 누르면 됩니다.

라즈베리파이 SD카드 OS 굽기

굽기가 완료되고 확인하면 668 MB 드라이브만 보이는데 디스크 관리자에서 보면 파티션이 분할되어 있는 것을 볼 수 있습니다.

이제 라즈베리파이에 넣고 부팅을 해보면 되겠네요~


블로그 이미지

영은파더♥

가상서버호스팅 VPS 리눅스 서버관리 윈도우 IT

,

라즈베리파이 3 모델 스펙 비교


이번에 코어성능이 강화된 Raspberry Pi 3 Model B+ 를 출시했네요~

이전 모델이랑 한번 비교해봤습니다.


 Raspberry Pi 3 B

 Raspberry Pi 3 B+


 칩셋

 Broadcom BCM2837

 Broadcom BCM2837B0


 CPU

 1.2GHz ARM Cortex-A53 MP4 1.4GHz ARM Cortex-A53 MP4 

 RAM

 1GB LPDDR2

 1GB LPDDR2


 무선

 BCM43438 wireless LAN
 Bluetooth 4.1 Low Energy (BLE)

 2.4 / 5GHz 802.11.b/g/n/ac wireless LAN
 Bluetooth 4.2, Low Energy (BLE)
 

 유선

 10/100Mbps Ethernet

 10/100/1000Mbps Giga Ethernet


 GPIO

 Extended 40-pin GPIO header

 Extended 40-pin GPIO header


 영상

 Full size HDMI
 DSI display port
 composite video port

 Full-size HDMI
 DSI display port
 composite video port


 음성

 3.5mm 4-pole stereo output

 3.5mm 4-pole stereo output


 카메라

 CSI camera port CSI camera port 

 USB

 4 USB 2.0 ports

 4 USB 2.0 ports


 SD카드

 Micro SD port

 Micro SD port


 전원

 5V/2.5A DC power input

 5V/2.5A DC power input


▶ 라즈베리파이 3 B+ 스펙

  • Broadcom BCM2837B0, Cortex-A53 (ARMv8) 64-bit SoC @ 1.4GHz
  • 1GB LPDDR2 SDRAM
  • 2.4GHz and 5GHz IEEE 802.11.b/g/n/ac wireless LAN, Bluetooth 4.2, BLE
  • Gigabit Ethernet over USB 2.0 (maximum throughput 300 Mbps)
  • Extended 40-pin GPIO header
  • Full-size HDMI
  • 4 USB 2.0 ports
  • CSI camera port for connecting a Raspberry Pi camera
  • DSI display port for connecting a Raspberry Pi touchscreen display
  • 4-pole stereo output and composite video port
  • Micro SD port for loading your operating system and storing data
  • 5V/2.5A DC power input
  • Power-over-Ethernet (PoE) support (requires separate PoE HAT)

가격 35달러


▶ 라즈베리파이 3 B 스펙

  • Quad Core 1.2GHz Broadcom BCM2837 64bit CPU
  • 1GB RAM
  • BCM43438 wireless LAN and Bluetooth Low Energy (BLE) on board
  • 40-pin extended GPIO
  • 4 USB 2 ports
  • 4 Pole stereo output and composite video port
  • Full size HDMI
  • CSI camera port for connecting a Raspberry Pi camera
  • DSI display port for connecting a Raspberry Pi touchscreen display
  • Micro SD port for loading your operating system and storing data
  • Upgraded switched Micro USB power source up to 2.5A


▶ 라즈베리파이 제로 W 사양

  • 802.11 b/g/n wireless LAN
  • Bluetooth 4.1
  • Bluetooth Low Energy (BLE)
  • 1GHz, single-core CPU
  • 512MB RAM
  • Mini HDMI and USB On-The-Go ports
  • Micro USB power
  • HAT-compatible 40-pin header
  • Composite video and reset headers
  • CSI camera connector

라즈베리파이 3 보다는 사양은 많이 딸리지만 크기가 작습니다.

가격 10달러


▶ 라즈베리파이 제로 스펙

  • 1GHz single-core CPU
  • 512MB RAM
  • Mini HDMI port
  • Micro USB OTG port
  • Micro USB power
  • HAT-compatible 40-pin header
  • Composite video and reset headers
  • CSI camera connector (v1.3 only)

라즈베리파이 제로 W 에서 무선기능이 빠진 제품입니다.

가격 5달러


라즈베리파이 보다 더 작은 초소형컴퓨터도 개발중이라고 하니 앞으로 기대가 됩니다.

얼마전 IBM 에서 1mm 쌀알 크기 보다 작은 사이즈의 cpu 도 개발하고 있다고 합니다.

상용화까지는 더 시간이 걸리겠지요~


'IT제품' 카테고리의 다른 글

코딩교육용 마이크로비트 개발보드  (0) 2018.03.30
미니컴퓨터 Omega2 스펙  (0) 2018.03.27
배터리 손난로 DIY 제작  (0) 2018.01.13
Coms 보조배터리 18650용  (0) 2018.01.13
AONE BIT 80PLUS 채굴전용 파워  (0) 2017.12.21
블로그 이미지

영은파더♥

가상서버호스팅 VPS 리눅스 서버관리 윈도우 IT

,